14.2.12

DIY: Lace Bandeau

Okay, so like I've been saying, I am totally obsessed with LACE. Tis' the season for lace I guess! I got the inspiration for this DIY from my excessively over protective boyfriend, believe it or not. The other night we went to a bar and apparently my shirt was a little too see through for his liking. SO being the good girlfriend I am (let me rephrase that Fashion forward girlfriend) I decided I would make a pretty bandeau that I would not feel totally lame wearing.

Materials

Solid color bandeau
STRETCHY lace fabric (make sure it is stretchy because it needs to coincide with the bandeau)
Thread and needle (I used a sewing machine but thread and needle could easily be used)
Scissors


This DIY is very simple. It is also not too time consuming, if you are using a sewing machine. Otherwise, it will take you probably about an hour, depending on what level your sewing is at. 

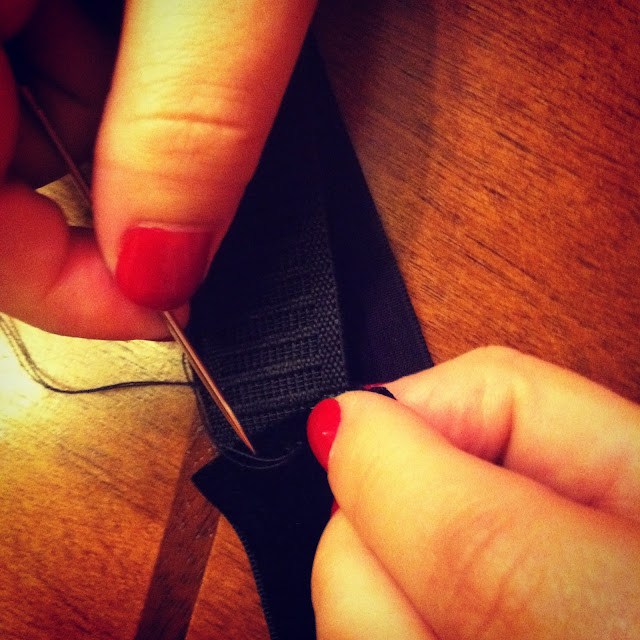
First, you will want to take the stretchy lace material and measure how much you will need, according to the bandeau size. Then, you will want to position it very precisely. What I did was take some pins so the material stays in place. Once you do that the only thing left to do is sew. SEW SEW and Sew some more. And there you have it! A quick and easy way to whip up a lace bandeau! 


6.2.12

DIY Lace Choker

Right now, as of this moment, I am honestly in love obsessed with incorporating lace into my everyday outfit. Something about it, is just so elegant. It can make jeans and a tee-shirt look elegant! Its just a trend that I love and always have loved. This is the first of MANY Lace DIYs to come! Hope you enjoy! This was a very simple DIY and there is no excuse for not trying it! 


Materials 
Lace
Measuring tape
Velvet or black ribbon (I used velvet) 
Needle and thread or sewing machine 

Start by measuring the or estimating how much ribbon or velvet you will need in order to fasten the choker. Remember, you will need two identical strips. In my case, I measured about 6in for each side, making it a total of 12 in. of velvet. Size may very depending on how tight or lose you would like it. 

Next, you'll want to sew the strips to each side. 

And then you have it! A beautiful five minute Lace choker! 


2.2.12

DIY Valentine

So the day of love is approaching rather quickly. A little too quickly for my liking honestly! I JUST finished recovering from Christmas! This is my second Valentines day with my boyfriend and I figured I would do something creative and inexpensive for a change. Not only are you giving your bank account a rest but your also doing something creative and meaningful! It's a win win for everyone honestly. Being that I don't want to divert back towards my normal ways of procrastination (This past Christmas I was literally still buying gifts on Christmas Eve) I decided to get ahead of the game. 
The first idea is to create a book using ribbon and colorful. Not just any ordinary book, but a book about your relationship. I added in some pictures and ticket stubs from sporting events we've been to as well to give it a little bit more of a personalized touch.


And of course here are some other very cute ideas I may just also try myself. 


30.1.12

DIY Jewled Headband

So this weekend I found myself once again studying every square inch of style magazines which contained pictures of the Golden Globes. Headbands seemed to be a very popular trend. I personally have always loved wearing headbands because it can hide a bad hair day very well. Just kidding (not really). I love headbands so much because they can dress a casual hair style and outfit up with just the perfect touch. I created my own version of the headband, which was very simple. 

The Inspiration


My DIY Version 

You'll need

Velvet 
Scissors
Measuring Tape
Different shapes and sizes of rhinestones 
Black Thread 
Glue gun 
Needle 
Elastic 
First, you place the measuring tape around the your head, as if it were a headband. Then, carefully measure how much of the velvet you will need.  Make sure you subtract four inches off of the total measurement so can place your elastic. 


Next you should cut four inches of the elastic and begin sewing with your needle and black thread. 


Once you have your base set up, then you should begin to position the rhinestones however you would like. What I did was first place them before I actually glue gunned the pieces just so I could make sure I liked the design. It would really suck if you had to start all over because you didn't like the design when you came this far! (Take it from someone its happened to in the past). 

And there you have it! You're ready for anything from a casual day shopping to a night out in the town! 


26.1.12

DIY Inspiration: J.J. Winters Clutch

So I decided. Every girl should have needs a not so average clutch. I'm not talking about a black clutch with a little bit of gold trimming. No. I'm talking an extravagant piece of art that would be a one in a kind asset for your wardrobe. Yeah, not too many of us have one of those. I can't honestly even say I have one. Some say its because they don't have the money to buy something so inessential when in reality it IS an essential. Or others just simply forget how important a one of a kind clutch truly is. But now, I don't really think there is an excuse. Within the next few weeks week I will be working on creating a clutch using this as my inspiration:


I will post the results so all my wonderful followers can too own a not so average clutch!